Showing posts with label MAC. Show all posts

Thursday, 22 May 2014

The Maleficent x MAC collection

Can you believe that I have no idea what the movie Maleficent is about? Well I know Maleficent is the name of the character played by Angelina Jolie in this movie and that it's based on a Disney story but I don't think I've ever watched the original Disney animation. If I did, I definitely can't remember it. Anyway, the point of saying all of this is that even though I don't know much about Maleficent I still can't wait to watch this movie! Most of this curiosity for the movie is sparked by the posters and how fabulously intriguing Angelina Jolie looks as Maleficent. The horns and makeup are just so perfect. Mac has launched a new makeup collection that puts together the whole makeup look of Maleficent. How amazing is that? Not everybody would be able to roam the streets everyday with the complete Maleficent look (although that would make a wonderful statement in street style wouldn't it? ) but it would be great to tone down the look and use it for events and such.
Products (clockwise from top) : Maleficent #36 Lashes, Maleficent Eyebrows in Fling, Maleficent Nail Lacquer in Nocturnelle, Maleficent Eyeshadowx4 and Maleficent Lipstick in True Love's Kiss. 
DuJour also did an interview with the makeup artists that created this look and you can check it out at http://dujour.com/article/maleficent-mac-makeup/43688 They talk all about the 50 pairs of horns they had to make for the movie and other fascinating details about the whole look.

Let me know what you think of this new MAC Collection and also the DuJour article in the comments below. Have I mentioned how much I like reading the comments you guys leave? Because I do! So go ahead and write me something to read. 

Tanaya <3 

Tuesday, 18 February 2014

Eye Look : Museum day!

I've wanted to publish this post for so long now because I went to the museum about 2 weeks ago and that's when I clicked the pictures. I used one of my favorite BB creams as a base since I didn't want anything too strong and dramatic. However, I felt like experimenting with my eyeshadow palettes and trying a new look. I was so happy with this look that I knew I had to click pictures of it to share it with you guys. After that day, this look has pretty much become my everyday look and I love how versatile it is. The shades blend so well together that I think this look could work for just a casual day or a daytime event too when a smokey eye is too loud.
I started with my Elizabeth Mott Creamy Shadow Stick(Received in ipsy bag) in the inner corner of the eye and over the inner half of the eyelid. It isn't pigmented enough to be a shade on it's own but it works well as a base since it's shimmery and the sparkles show through the shade you apply over the top. I then used a shimmery burnt orange shade over the top and went further out to cover the whole eyelid. This creates a natural gradient since the part of the eyelid with the shadow stick base appears lighter. You can blend it to achieve a better gradient. I then blended the dark plum eyelid shade from my wet n wild eyeshadow trio, that I reviewed here, into the crease (Yup I used an eyelid color for the crease. pretty badass right? Hahaha).  Finally, I used a really light golden color from an old Chanel palette that I hadn't used for ages and used it to highlight the inner corner of the eye and the middle portion of the eyelid (be careful not to cover up the actual shade you used on the eyelid. Just pat enough highlight to add some glitter and dimension.)  A winged eyeliner with my standard MAC Gel Eyeliner and a coat of Revlon Lash Potion (review) completed the look. Update: I don't think I used any mascara at all actually. I think I just didn't want the look to be too over the top for that day but I use that mascara for other days when I don't mind the little extra flutter. 

I hope you liked this look. Tell me if you would like to see a complete tutorial for it so that I can add it to my list of videos to do when I finally have the courage to start a youtube channel. If you do try it out, tweet or instagram the picture and link it to me so I can see it. It's just fun to see how the same look adapts to everyone's personal style. 

Find me on: 
Trace
 GFC

Tanaya <3


Wednesday, 1 January 2014

My Christmas Outfit & Makeup.

How long has it been since my last post? Not long I hope. I know it's a little late for christmas outfit posts but I still wanted to share it no matter what time of the year it is. I really love the eye look that I did on Christmas so I did the same one for New Year's Eve too. I think it adds a wonderful glow to the face and looks great with almost every outfit. So it's only appropriate to start with the eye look.


I just used a random eyeshadow palette but I would love to do a tutorial for the look if you would like to see one. I am absolutely obsessed with it. I also used the Revlon Lash Potion mascara and I apologize for the less than good mascara application but I was in a hurry. I also used the Maybelline Dream Lumi Touch Concealer. Now for the rest of the look.
I used the MAC Frankly Scarlet blush with some Em Cosmetics Lipstick in Violaceous that I reviewed here. I also used the Benefit Hoola bronzer. Oh and how could I forget! I've also used my most recent and favorite purchase- the Pond's BB+ Cream. It makes the skin look just so flawless and it's a shame that I can find it only in India :( I will do a proper review soon. I've also gotten a new haircut since that picture which I'm so excited to share so follow me on Instagram to see it! 


For my outfit I chose my lovely Forever 21 white lace dress. Something about white and red just makes me think of christmas. The dress is so adorable and it has a cutout back.

I hope you like this post. What do you think of my look and outfit? Leave me links to your christmas outfit posts or just send me a picture on twitter! I would love to see them all. Don't forget to follow me on Facebook, Bloglovin' , Polyvore, Instagram, GFC & Twitter.

Tanaya <3

Sunday, 8 December 2013

My Best Smokey Eye Yet:StudioGear Smokey Eye Palette Review.


I’ve always been quite scared of doing a black smokey eye look and every time I’ve tried it before, it turns out quite rubbish. (And that’s why I love brown smokey eyes and I do them pretty well I suppose.) However, I was recently sent this Holiday Smokey Eye Palette by Studio Gear and I was excited to try my luck at doing a smokey eye look again! I was quite anxious but I think it turned out pretty great and I was happy with it. I also realized why I was rubbish at it before and that had to do with the texture of the shadows I was using. These Studio Gear shadows may not be perfect for every look but their texture is exactly what you need to do a great black smokey eye. With a color like black, if you use a really soft and creamy shadow you will mess up the smokey eye look. However, these shadows have a sort of ‘grainy’ texture which I thought was odd at first but it gives you a lot more control while blending. These aren’t soft shadows but the texture is absolutely perfect for what they’re meant to do.


The packaging is really pretty and reminds me of the wonderful city lights. It’s really thin and sleek and perfect to carry with you on a vacation (which I actually did!).


Inside, we have a set of instructions, which aren’t the easiest to understand, but if you just follow the little diagram you will be good. I love the ‘coal’ and ‘charcoal’ shades and the only shade I really don’t like is the Frost shade. You can kind of see the grainy texture I was talking about in the swatches below and that strange texture works for every shadow except ‘frost’. In the center is my favorite bit- the blush! It’s the prettiest shade ever and it’s perfect for winter. I just love this shade of blush and I think I’m going to pop it out of this palette and put it in another magnetic palette to carry around with my other blushes.
 
blush, coal, glimmer, charcoal, frost
After that extraordinarily long description and review, here’s the smokey eye look I created. 


I hope you guys like this look and tweet me a picture if you recreate it. Also I would love to do a tutorial and I'm thinking of starting a youtube channel so that I can post tutorials for you guys so let me know, in the comments below, if that's a good idea and if you would watch my videos. In the meanwhile I can do a tutorial for this look right here on the blog if you want me to. 
Don't forget to follow me on Twitter, Facebook, Bloglovin' and gfc. 

Happy Holidays!
Tanaya <3


*Powered by BrandBacker. 
All opinions are honest and my own.

Tuesday, 3 December 2013

Stars On Your Eyes : Starlooks Eye Pencil Review and Favorites!


Eyeliner….The one product that we all try so hard at perfecting but unfortunately, most of us are terrible at it. Eyeliners in any color can make a look perfect but they’re so annoyingly difficult to apply that beauty brands need to come up with new formulations and applicators all the time. When it comes to black eyeliner I love gel eyeliner because I find it much easier to use. However, colored and sparkly eyeliners are a whole different story. I tend to find that pencils are the easiest and unlike black eyeliner you don’t always need a precise and bold line. This post is like a cross between a review and a favorites post because I wanted to review the Starlooks eyeliner pencil but tell you guys about some of my other favorite colors.

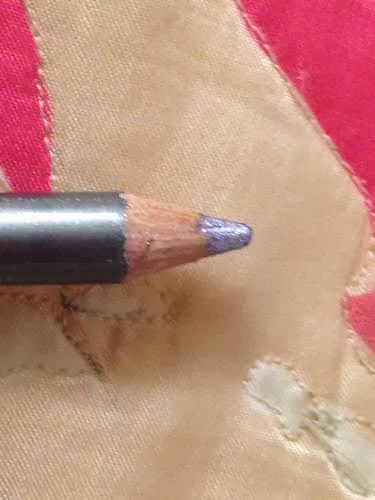
I received the Starlooks Gem Eye Pencil in my November ipsy bag. I got the shade Amethyst that is the one I really hoped to get because I love it! It’s wonderfully glittery with a hint of purple. The texture isn’t too hard not too creamy so it’s easy enough to handle and doesn’t smudge all over the place. This is my go-to liner for days when I’m late for anything and my face reveals that I’m sleepy because it just brightens up the eyes.


I believe that sparkly pencil eyeliners are perfect for any look and also for when you’re not doing any look! For those makeup-free days just put some lip balm and a bit of glitter eyeliner and you’re good to go. I have certain staples that I always make sure I have and buy backups for when I’m about to run out of. These are my all-time favorite glitter eye pencil shades:
 Copper, Gold, Greenish-Blue, silver and white.

Now I know white isn’t glittery but it’s the only matte eyeliner pencil in my essentials so I just included it in here. I tend to use the Gold liner more during summer and although the copper seems perfect for fall/autumn, it's just such a lovely shimmery neutral that it looks good all year round. 

I suggest you try out the Starlooks Amethyst eye pencil especially if you have brown eyes because it will make your eyes looks lovely. I have always been a fan of this shade and had a Colorbar eye pencil in the same color but it had the worst texture I've ever seen! Try out some eyepencils in copper and gold too because I bet you will love them. I hope you liked this post. Do you have any staple shades that you always need in your collection? Let me know in the comments below. Don't forget to follow me on Twitter, Facebook, Bloglovin' or gfc. 

Tanaya <3 

Saturday, 19 October 2013

Easy Fall EOTD : Fall In Love With Fall

This is probably the easiest Fall eye makeup look you'll come across. do you know why I'm so sure? Because I know that I'm lazy when it comes to putting on makeup early in the morning while I'm in a hurry. I used my Revlon Illuminance Creme Eyeshadow Quad ( Review ) for this look and I didn't even use all the colors. You can use any other creme eyeshadow or powder eyeshadow that's the same color. I just used this one because I love how easy and fast cream eyeshadows can be.

1. Start with a clean eyelid that has been moisturized and prep with an eye primer. 

2. I started by using the lightest color in the palette which is a shimmery pinkish-silver. It is a highlight color but I used it all over the lid. You could use any silver shade with pink tones.

3. I was never a huge fan of the darkest color of this palette but recently it's been such a convenience because it can take a look from zero to glam in seconds! I used this dark purpley-brown shade on the outer corners and crease.and blended it into the first light color.

4. You could end the look at step 3 but if you want to go for a more dramatic look layer on the dark color. Then I added a bit of NARS Albatross( Review coming soon!) to highlight the middle portion of the lid. This step just makes the look more dramatic and sultry like a purpley-brown smoky eye (if that exists). 

5. Finish up by blending well, curling the lashes and some nice mascara. I've used the Revlon Lash Potion Mascara ( Review ). 


Add some blush and a tiny bit of bronzer(optional). I didn't used any lipstick and just used a lip balm from the body shop because I didn't want to distract from the eye look.


PS: Do you notice how you can only see half my face in all the pictures? I put makeup on only one half of my face because I thought of doing a before and after shot. The idea got messed up! Hahaha So I apologize for all the awkward half-face pictures. 

I hope you liked this look and if you try it, send me a picture on Twitter or Facebook. Don't forget to follow me on Bloglovin' and gfc if you want to read more of these posts. 

Tanaya <3
Sunday, 4 August 2013

LOTD : Products from the Thai Haul.

To follow up after my last post, I thought I should do a look with as many of the products from the Thailand Haul as I can. This being my first ever LOTD I decided not to get very creative...don't worry I will get creative with my next LOTD post. This look is very basic and pretty fast and simple to recreate.

Face : I used my usual foundation since I hadn't bought any foundation fromThailand. A light touch of Hoola Bronzer by Benefit. Frankly Scarlet by MAC. A few drops of Highbeam by Benefit for a highlight on the cheekbones. Rimmel London's Stay Matte Powder in Mohair (I always use a powder that is a few shades darker than my skin tone in order to avoid a cakey effect) 

Lips : I used my Benetint lip and cheek stain to lightly stain the lips. The color can easily be built to create a deeper red hue. I have grown quite fond of this product and found it more efficient as a lip stain rather than a cheek stain.


Eyes : I used only one eyeshadow for this look since I had bought only one eyeshadow from Thailand but it still looked like a complete look due to the beautiful color. This is the little local brand eyeshadow pot. The eyeliner is my old and trusted Mac gel eyeliner with a wingtip. Since I was already planning on doing a detailed review of the Sweet Princess Limited Edition Mascara, I didn't use any mascara here in order to avoid repetition. 

Hope you like this look. You can recreate it using the same or similar products. If you do recreate it, let me know in the comments below and send me a picture on twitter using #thesecretlife_recreate . 

T <3 


Wednesday, 31 July 2013

Thailand Beauty Haul

One of my favorite kind of posts to read are hauls and one of my favorite shopping destinations is Thailand. So it seems appropriate that's very first haulpost is a haul from Thailand! This was my third visit to Thailand (what can I say...I just love everything about the place...the food, shopping, language). However, on my first 2 visits I was oblivious to the fact that Thailand is a beauty lover's shopping heaven. Since I was still exploring the Thai beauty and makeup world this haul is pretty small. What I was really excited about was that Benefit cosmetics were available in Thailand! They're not available in India and so when I saw all those products I've wanted to try for so long I was overjoyed! 

1. Feelin' Cheeky! Minis by Benefit : This is a trio of miniature sized bottles of Benefit's best selling tints - Benetint, Highbeam and Posietint. 2 lip and cheek tints with 1 highlighter - seems like a pretty good combination.

2. Hoola by Benefit : if you've read my Makeup Wishlist you would know that I've been on the lookout for a new bronzer so I thought I would give this highly-talked-about bronzer a whirl.

3. Coralista by Benefit : if you're a makeup artist, beauty blogger/vlogger, or just a makeup enthusiast you've definitely heard about this blush. Some say its even better than NARS Orgasm! 

4. Frankly Scarlet by MAC : it's a beautifully bright red color with pink tones. I first heard about this blush in Tanya Burr's videos and blog posts. It looks quite scary in the pan and scary as a swatch too because of its great pigmentation. However, once you blend it in, it looks fabulous! 


After the above purchases I was more curious to try out some Thai and Korean brand products so here's what I got.

5. A local brand Eyeshadow. The packaging is so cute and the color looked even better when swatched. I knew it would be a difficult shade to find in any of the usual brands so there wasn't much hesitation while getting this.


6. 12plus Love Cologne : i think it would be rather difficult to find a Thai product that does not come in a cute bottle. This little heart shaped bottle is the perfect size to carry around in your bag. The fragrance is quite nostalgic since it reminds me of another perfume (of the same brand) that I had bought on my first visit to Thailand and I used it all through my childhood! 

7. The tiny compressed face masks : I first came across these in a post on a beauty blog called Indian Vanity Case. They look like tiny coins that are supposed to be soaked in green tea, rose water, rosehip oil, or any other mixture that is good for the skin. When soaked in the liquid they bloom out to form a face mask that allows your skin to drink up the nourishment of the rosewater, tea or essential oil. If this description does nothing but confuse you, just let me know in the comments below if you would like to see a tutorial of it.

8. The Sweet Princess Limited Edition Mascara : I had heard a lot about Thai and Korean brand mascaras so I was eager to try one! I had intended to try the Fairy Drops mascara which I couldn't find anywhere (let me know what you think of it if you've used it) so I settled for this one. Gorgeous packaging + cute tiny tube + it had the magical words "limited edition" on it :p = irresistible! 

I also bought the black makeup pouch in the first picture in a local market in Bangkok. Pretty posh isn't it? I think I'll do another post about a clothing and accessories haul...would you guys like one? 

T<3 

Trending Articles

LinkWithin

Related Posts Plugin for WordPress, Blogger...